This homemade pizza dough recipe was built with the home cook in mind. No specialty equipment, no overnight rest required, and no dough that fights back when you try to stretch it. Soft, chewy, and ready in 90 minutes.
Why You Will Love This Homemade Pizza Dough
- Ready in 90 Minutes From mixing bowl to oven-ready dough in about an hour and a half, with most of that time being hands-off rising rather than active work.
- Only 6 Ingredients Flour, yeast, honey, water, olive oil, and salt. Everything's already in your pantry and nothing requires a specialty store.
- Works in Any Kitchen The microwave proofing method means you don't need a warm kitchen or a professional proofing box. It works in a cold Cleveland winter kitchen just as well as anywhere else.
- Versatile Dough Use it for pizza, stromboli, or calzones. The balance of strength and softness means it holds fillings without tearing and stretches without fighting back.
- Freezer Friendly This dough freezes well for up to three months, which means one mixing session can cover multiple pizza nights.
The Ingredients for the Pizza Dough
- 00 Flour (or All-Purpose Flour) 00 flour is ground extra fine, which gives the dough an incredible stretch and a chewy crust. However, standard all-purpose flour is a reliable alternative that still produces a delicious result.
- Dry Yeast It feeds on the sugars to create air bubbles, giving the crust its rise and airy texture.
- Honey or Sugar The sugar in the honey provides immediate food for the yeast to start "feasting," helping the dough rise faster. I feel that honey does work better and provides better tasting dough.
- Warm Water Water rehydrates the yeast. It needs to be warm (not hot) to create a humid environment that encourages the yeast to activate.
- Olive Oil Adding oil creates a softer, more tender crumb and makes the dough easier to stretch without tearing.
- Sea Salt Added after the first rest, salt strengthens the gluten structure and controls the yeast so it doesn't rise too fast, while also seasoning the dough.
Why the Pizza Dough Recipe Works
- The Honey Head Start Yeast needs sugar to thrive, and honey provides an immediate food source. By mixing the honey with the warm water and half the flour first, you allow the yeast to start feasting immediately. This ensures a strong, active rise before you even finish mixing the dough.
- A DIY Proofing Box One of the biggest challenges in home baking is finding a warm, draft-free spot, especially during colder months. Placing a glass of warm water in the microwave creates a humid environment. This mimics professional bakery proofing boxes, keeping the dough moist and encouraging a consistent rise.
- Fat for Tenderness While a baguette uses only flour and water for a chewy texture, pizza dough benefits from tenderness. The addition of olive oil coats the flour proteins. This ensures the crust remains soft and does not dry out during the high heat of baking.
- Patience for Stretching Pizza dough is naturally elastic because of gluten. If the dough snaps back when you try to shape it, forcing it will only tear the crust. Letting it rest for five minutes allows the gluten to relax. This simple pause makes stretching the dough to your desired thickness effortless.
- A Very Versatile Dough Because this dough strikes a balance between strength and softness, it is not limited to pizza. It holds its shape well enough to enclose ingredients, making it an excellent choice for homemade strombolis and calzones as well.
How to Proof Dough in a Cold Kitchen
One of the biggest struggles with homemade pizza dough is getting it to rise when your kitchen is chilly (especially here in Cleveland during winter!). Yeast loves a warm, humid environment—ideally around 75-80°F. If your house is cooler than that, your dough might stall and stay flat.
Here are my two methods to create a place for proofing in your home:
Method 1: The Microwave This is my usual method because it is fast and contained.
- Fill a glass measuring cup with water.
- Microwave it on high for 1 minute until it is hot.
- Push the water cup to the back corner of the microwave.
- Place your bowl of covered dough inside and close the door immediately.
- Do NOT turn the microwave on. The trapped steam and heat create a tropical environment for your yeast to wake up.
Method 2: The Oven Steam Bath If you are making a double batch or your bowl doesn't fit in the microwave, use your oven.
- Boil a pot of water on the stove.
- Place the pot of boiling water on the bottom rack of your oven.
- Place your bowl of dough on the rack above it.
- Keep the oven OFF. Close the door to trap the steam.
- Let it sit for the full rise time. The residual heat from the water keeps the air warm and moist.
How to Make the Homemade Pizza Dough
- Proofing the Yeast Start by grabbing a large mixing bowl. Combine 1 teaspoon of dry yeast, 1 tablespoon of honey, 10 fluid ounces of warm water, and roughly half of your flour (about 7.5 ounces). Mix this well until it is smooth and fully incorporated. This step wakes the yeast up so it can start feeding on the honey. To give it a boost, I like to create a warm environment. I usually heat a glass of water in the microwave to make it steamy, then place the covered bowl inside (with the microwave off!) for 15 minutes.
- Mixing the Dough Once the mixture is bubbly, it is time to build the dough. Add the remaining flour, 1 tablespoon of olive oil, and 1 ½ teaspoons of sea salt. Stir to combine, then knead for about 5 minutes. You can do this by hand or with a stand mixer.
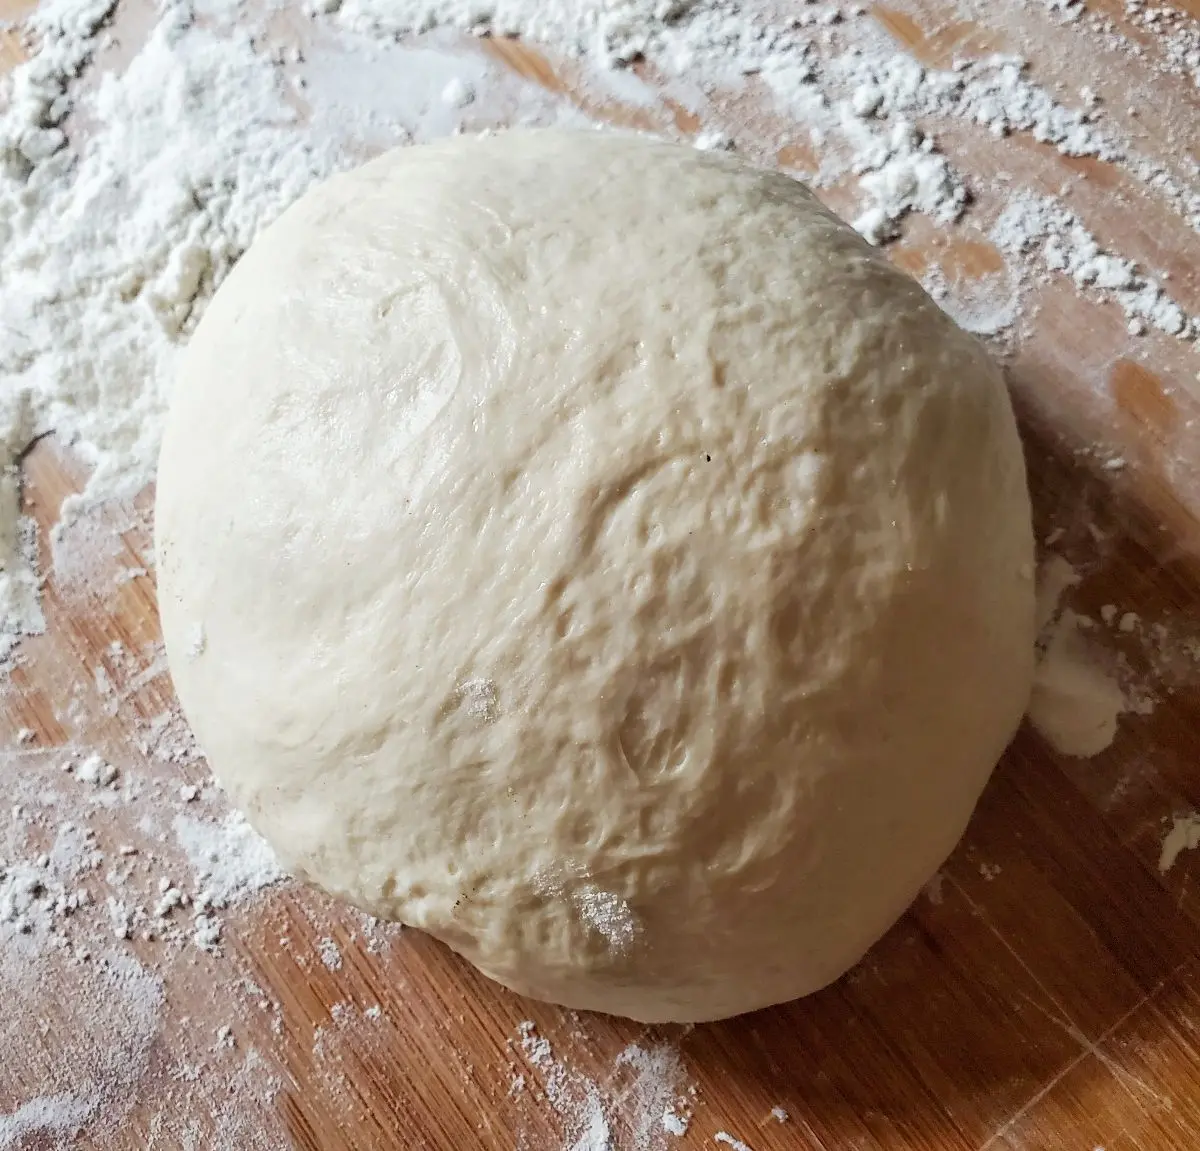
- The Main Rise Prepare a clean bowl by brushing the remaining tablespoon of olive oil around the inside. Place your dough ball in the bowl and turn it once so the top is coated in oil—this prevents it from drying out. Cover the bowl with plastic wrap and return it to that warm, humid spot (like your microwave) for one hour, or until it has doubled in size.
- Shaping and Baking Preheat your oven and prepare a 12x16 inch baking sheet with parchment paper. Brush a little olive oil on the paper. Gently spread the dough out with your fingertips. If your dough keeps snapping back to the center while you are trying to stretch it out, the gluten is just tense. Stop fighting it. Cover the dough with a towel, walk away for 10 to 15 minutes, and try again. The gluten will relax and the dough will stretch easily. The dough may not stretch the whole baking pan depending on how thick you want the pizza.
- Time To Bake Add toppings and bake according to your pizza recipe.
Tips on Making the Easy Homemade Pizza Dough
- Never add salt directly to active yeast. Salt inhibits yeast activity. This recipe adds salt in the second mix after the yeast has already been activated, which protects the rise.
- The dough snapping back is not a problem, it's just telling you the gluten needs more time. Walk away for 10 minutes and it will stretch easily. Forcing it tears the dough and creates holes.
- A longer, slower rise always produces more flavor. If time allows, let the dough rise in the refrigerator overnight instead of for one hour at room temperature. The result is noticeably more complex.
- Weighing the flour produces more consistent results than measuring by volume. A cup of flour can vary by up to 20% depending on how it's scooped.
Troubleshooting You Pizza Dough
Dough isn't rising The yeast may be old or the water was too hot and killed it. Always check the yeast expiration date and use water that feels comfortable on your wrist, around 100 to 110 degrees F. If the mixture isn't bubbly after 15 minutes, start over with fresh yeast.
Dough is too sticky to knead Add flour one tablespoon at a time until the dough pulls away from the sides of the bowl. Avoid adding too much or the crust will be dense.
Dough is too tough and won't stretch It was either over-kneaded or needs more rest time. Cover with a towel and leave it for 15 minutes. The gluten will relax and stretching becomes much easier.
Crust is too dense after baking The dough didn't rise enough during the proof. Next time use the microwave proofing method and ensure the yeast was active and bubbly before building the full dough.
Crust is too chewy The dough was over-kneaded. Five minutes is enough. Beyond that the gluten structure becomes too tight and the baked crust loses its tenderness.
Dough dried out during the rise The bowl wasn't coated in oil or the plastic wrap wasn't sealed tightly enough. A dry skin forms quickly on exposed dough and prevents an even rise.
Use the pizza dough recipe with my honey sriracha chicken pizza recipe or pizza rolls!
Craving more bold flavors? Browse my Italian recipes for more family-style favorites that are perfect for Sunday dinner.
FAQ's
While traditional all-purpose flour works fine, the recipe recommends using 00 flour for ideal results, which can be found in most grocery stores or online.
If you don't have a kitchen scale, the spoon and sweep method is a great alternative for accurately measuring the flour.
Place a glass of warm water in the microwave to create a warm, humid environment. You can then place the covered bowl with the yeast mixture or dough inside the microwave (without running it) to help it rise effectively.
If your dough springs back, it means the gluten needs to relax. Cover the dough and let it rest in a warm place for five minutes. After this short rest, it should be much easier to spread to your desired thickness.
This versatile dough is also ideal for making delicious homemade strombolis and calzones.
Recipe
Easy Homemade Pizza Dough
Ingredients
- 15 ounces 00 flour or all purpose flour or roughly 3 ⅓ cups with the scoop and sweep method
- 1 teaspoon dry yeast
- 1 tablespoon honey
- 10 fluid ounces water
- 1-½ teaspoons sea salt
- 2 tablespoons olive oil divided
Method
- Combine the yeast, honey, warm water, and half the flour in a large mixing bowl. Mix until smooth and well combined, scraping down the sides as needed
- Cover the bowl and let the mixture rest for 15 minutes. For a faster rise, place a glass of boiling water in the microwave, then set the covered bowl inside with the microwave off. The trapped steam creates an ideal environment for the yeast
- Once bubbly, add the remaining flour, salt, and one tablespoon of olive oil. Knead by hand or with a stand mixer for about 5 minutes until the dough is smooth and elastic
- Brush a clean bowl with the remaining tablespoon of olive oil. Place the dough inside and turn once to coat the top. Cover with plastic wrap and let rise for one hour or until doubled in size
- Turn the risen dough out onto a lightly floured surface. Gently stretch to roughly fit a 12x16 inch parchment-lined baking sheet. If the dough snaps back, cover with a towel and rest for 10 minutes before trying again
- Add toppings and bake according to your pizza recipe


Leave a Reply
You must be logged in to post a comment.