Why You Will Love This Easy Sweet Dinner Roll Recipe
- Only 20 Minutes of Active Time The dough comes together quickly and the oven does the rest. Most of the total time is hands-off rising rather than active work.
- Beginner Friendly The dough is designed to be forgiving. If you've never baked with yeast before, this is the recipe to start with.
- Sweet Butter Glaze Brushing the butter and sugar mixture three times during baking caramelizes the sugars and produces a sticky, golden crust that plain dinner rolls never achieve.
- Make-Ahead Ready Prepare the dough and shape the rolls the night before. Refrigerate them overnight and bake fresh the next day with no extra effort.
- Works in Any Kitchen The microwave proofing method creates a warm, draft-free environment for the dough to rise, which means these rolls work just as well in a cold Cleveland winter kitchen as anywhere else.
Ingredients for the Best Dinner Rolls
- Rapid Rise Yeast This is the engine of the recipe. It provides the lift and fluffiness without the long rising times required by traditional yeast.Check the expiration date before you start. Old yeast that doesn't foam after five minutes will produce flat, dense rolls no matter how well everything else goes.
- Sugar or Honey This serves two purposes. It feeds the yeast to help it activate, and it adds a subtle sweetness that complements the savory dough.
- Warm Water (100°F) or Whole Milk Water acts as the solvent that activates the yeast. The temperature is critical. Warm enough to wake the yeast up, but not so hot that it kills it. You can also use whole milk instead of the water.
- Unbleached Flour This provides the structure and gluten strands that trap the air bubbles created by the yeast, giving the rolls their shape and chew.
- Olive Oil Keeps the dough moist while rising. A tablespoon of olive oil coated over the dough ball before the rise prevents a dry skin from forming on the surface. That skin would block the dough from expanding properly during the rise.
- Butter Topping Brushing melted butter and sugar on top encourages beautiful browning and adds a sticky, sweet finish that makes these rolls deeply satisfying. The ratio of butter, water, and sugar in the glaze is what produces the caramelized finish. Too much water and it won't brown. Too little and it burns before the rolls are done.
Why This Recipe Works
- The Triple-Glaze Technique Most dinner roll recipes simply brush butter on at the end, but this recipe takes it a step further. You brush the sweet butter and sugar topping over the buns three separate times—before baking, halfway through, and right after they come out of the oven. This layering process allows the sugars to caramelize in the oven, creating a sticky, golden crust that is full of flavor.
- Rapid Rise Yeast Means Less Waiting By using rapid rise (or fast-acting) yeast, you significantly shorten the time needed for the dough to rise without sacrificing texture. This simple swap turns what is often an all-day project into a recipe that is ready in under two hours, making it ideal for busy weeknights.
- The Microwave Proofing Yeast loves a warm and humid environment to do its best work. Using your microwave (turned off!) as a proofing box protects the dough from cold drafts and traps the necessary heat. This trick ensures a consistent rise even if your kitchen is chilly.
- Even Baking Through Rotation Home ovens often have hot spots that can lead to uneven browning. This method instructs you to rotate the baking sheet halfway through the cooking time. This small step guarantees that every roll comes out golden brown and delicious.
- A Forgiving Dough for Beginners If you are new to baking with yeast, this is the recipe to start with. The dough is designed to be forgiving and requires only about 20 minutes of active effort. It takes the stress out of kneading and shaping, letting you focus on the fun of baking.
Making the Easy, Sweet, Soft, Dinner Rolls
- Activate the Yeast Pour the warm water (aim for 100°F) into a large bowl or your stand mixer bowl. Add the sugar (or honey) and the yeast. Stir gently. Let this sit for about 5 minutes until you see the mixture becoming foamy, indicating the yeast is active.
- Mix the Dough Add the olive oil and the flour to the yeast mixture. Mix until a shaggy dough forms.
- Knead Knead the dough for 5 minutes using a dough hook or by hand on a surface. The dough should be soft and slightly tacky, but not overly sticky. Form it into a smooth ball.
- First Rise Lightly coat the inside of a large bowl with olive oil. Place the dough inside and cover with plastic wrap or a clean towel. Let it rise in a warm, draft-free spot for 60 minutes, or until doubled in size. The microwave is a great draft-free spot, just do not turn it on.
- Shape the Rolls Punch the dough down gently and transfer it to a lightly floured surface. Divide the dough into 8 equal pieces. Roll each piece into a smooth ball and place them on a baking sheet lined with parchment paper.
- Second Rise Cover the shaped rolls with lightly oiled plastic wrap. Let them rise for another 10 minutes while you preheat your oven to 400°F.
- Make the Topping While the oven heats, melt the butter in a small bowl. Stir in the water and sugar until well combined.
- Bake and Glaze Brush the rolls with the butter mixture. Bake for 8 minutes. Carefully remove the pan, brush with more topping, and rotate the pan 180 degrees. Return to the oven and bake for another 4–6 minutes until golden brown.
- Serve Brush with any remaining topping and sprinkle with sea salt if desired. Serve warm.
Tips on Making the Easy Dinner Rolls
- The yeast foam test in step 1 is not optional. If the mixture isn't foaming after five minutes, the yeast is dead or the water was too hot. Starting over at this point saves the entire batch. Proceeding with flat yeast produces flat rolls.
- Do not skip the second rise after shaping. Ten minutes feels short but it relaxes the gluten and allows the rolls to puff slightly before hitting the oven. Skipping it produces denser rolls with less spring.
- Rotate the baking sheet at exactly the eight-minute mark rather than eyeballing it. Home ovens have hot spots and the rotation is what produces even browning across all eight rolls.
- Let the rolls cool for at least five minutes before serving. The glaze needs time to set slightly or it will slide off when the roll is pulled apart.
Troubleshooting Your Dinner Rolls
- Yeast isn't foaming after five minutes The water was too hot and killed the yeast, or the yeast is past its expiration date. Always check the date on the packet and use a thermometer to confirm the water is around 100 degrees F before adding the yeast.
- Dough isn't rising after an hour The kitchen is too cold. Move the bowl to the microwave with a glass of hot water and close the door. The trapped heat creates the warm environment the yeast needs to work.
- Rolls are dense and heavy after baking The dough didn't rise enough during one or both rises, or the yeast wasn't fully active before the flour was added. Both rises need to complete fully for light, fluffy rolls.
- Glaze is burning before the rolls are done The oven runs hot. Lower the temperature by 25 degrees and extend the bake time slightly. Check at the eight-minute mark and adjust from there.
- Rolls are pale after the full bake time The glaze wasn't applied generously enough or the oven runs cool. Apply a thicker coat of glaze before the final bake and move the rack to the upper third of the oven.
- Rolls stuck to the pan The parchment paper was skipped or the glaze dripped onto the bare pan during baking. Always use parchment and make sure the glaze is applied over the rolls rather than around them.
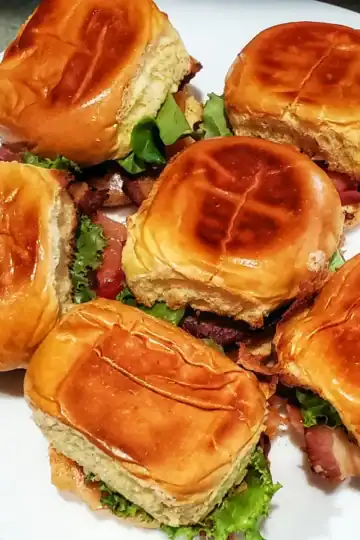
These sweet dinner rolls are perfect for making small ham sandwiches during brunch. For more dishes to serve alongside them, check out my Easter Recipes Roundup. These buns go great with my city chicken recipe. Like baking bread? Try my Cuban Bread Recipe.
FAQ's:
Yes! This is a great make-ahead dough. You can prepare the dough, let it go through its first rise, and then shape the rolls. Place them on the baking sheet, cover tightly, and refrigerate for up to 24 hours. Let them sit at room temperature for 30-45 minutes before baking.
Rapid-rise yeast shortens the rise time, but you can use active dry yeast—just adjust for a slightly longer rise.
Unbleached all-purpose flour is standard, but you can experiment with bread flour or a mix of whole wheat for a different texture.
They should be golden brown and sound hollow when tapped on the bottom. Rotating the baking tray halfway through ensures even browning.
Join My Email List!
Get no-fuss recipes and real-world kitchen skills sent straight to your inbox.
These rolls are the perfect side dish for my City Chicken Recipe or my Kale and Sauce sage Soup!
Recipe
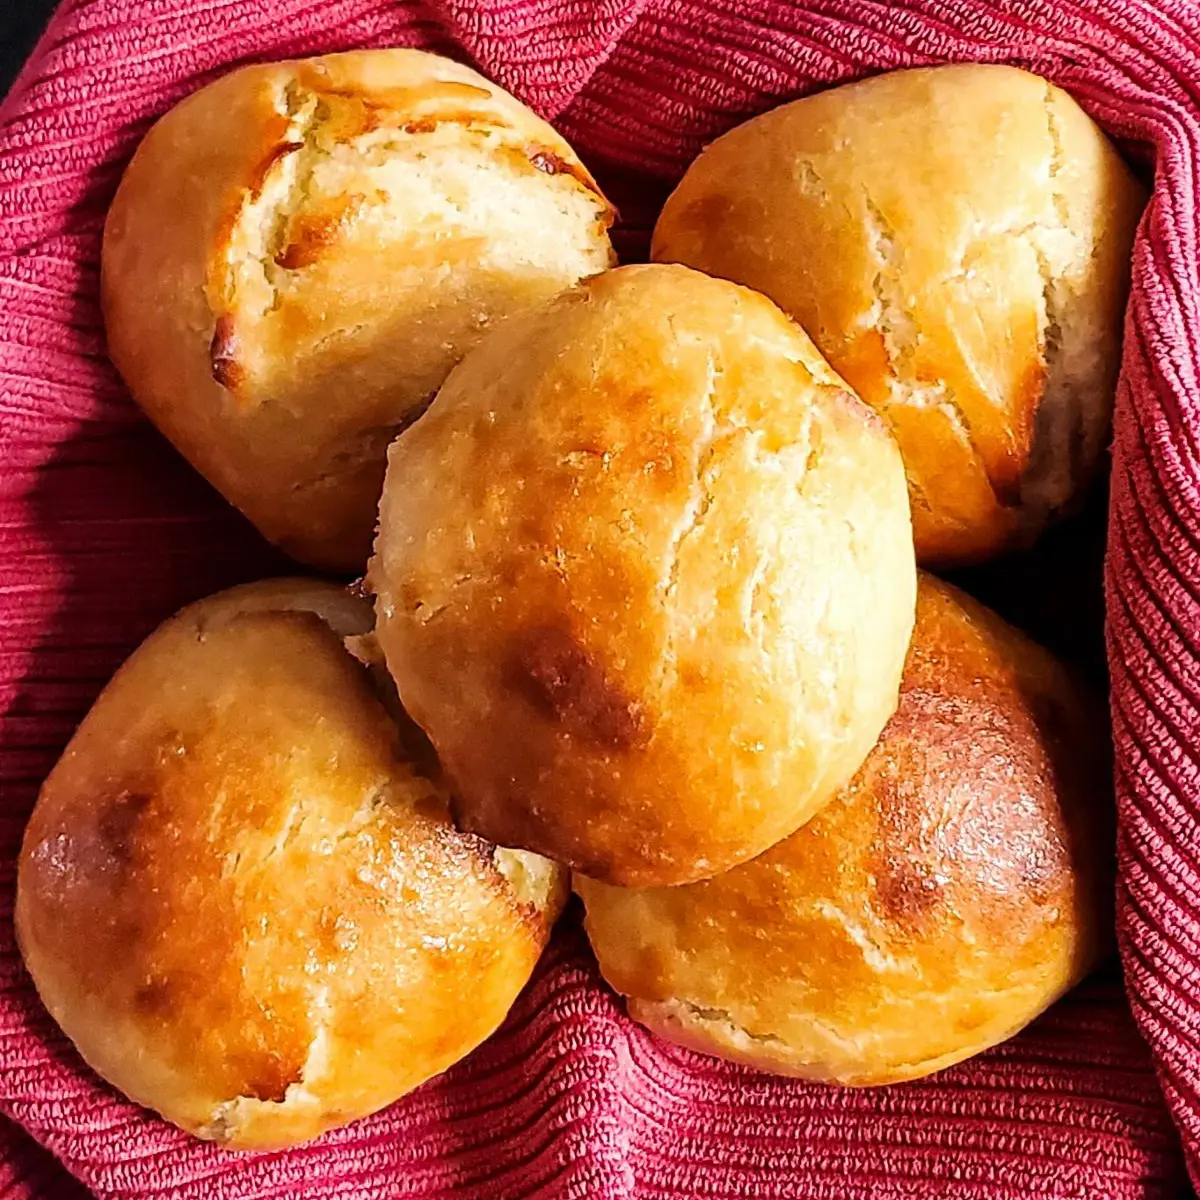
Easy Sweet Dinner Rolls
Ingredients
- 1 packet or 2 ¼ teaspoons of fast acting or rapid rise yeast
- 1 cup of warm water around 100 degrees F
- 2 tablespoons of sugar or 2 tablespoons of honey
- 2 ½ cups of unbleached flour
- 1 tablespoon of olive oil.
- 1 ½-2 tablespoons melted butter
- 1 tablespoon water
- 1 tablespoon sugar
Method
- Pour warm water in a large bowl or in the bowl of a stand mixer. Add the sugar (or honey), and yeast. Mix gently.
- In about five minutes you should see the yeast starting to react with the sugar. Once you see this you are on your way.
- Add flour and mix until dough comes together.
- Knead for five minutes with dough hook or by hand. The dough will be somewhat sticky. Form into a ball.
- Spread the olive oil on dough ball, place into a large bowl and cover with plastic wrap or a clean dish towel.
- Let dough rise in a warm area (I use the microwave. Don't turn it on.) for 60 minutes or until dough has doubled in size.
- Place dough on lightly floured surface and divide into eight pieces.
- Roll each piece into a bun and place on parchment lined baking sheet. Cover buns with lightly oiled plastic wrap and let rise for 10 minutes. Preheat oven to 400 degrees.
- While rising, make the topping by melting the butter and then adding the water and sugar. Mix well. You will be brushing the mixture on three times while baking the buns.
- After 10 minutes, rise brush mixture on on the buns and place in the oven and bake for eight minutes. At the eight minutes mark, rotate the baking sheet and brush on more mixture. Bake for an additional 4-6 minutes or until.
- Sprinkle with sea salt (optional).
Nutrition
Notes
- Make-Ahead Tip You can prepare the dough through step 5, cover the shaped rolls tightly, and refrigerate them overnight. Let them come to room temperature for about 30 minutes before baking the next day.
- Flour Measurement For the best results, spoon your flour into the measuring cup and level it off with a knife. Scooping directly from the bag can pack the flour and lead to dense rolls.


Leave a Reply
You must be logged in to post a comment.