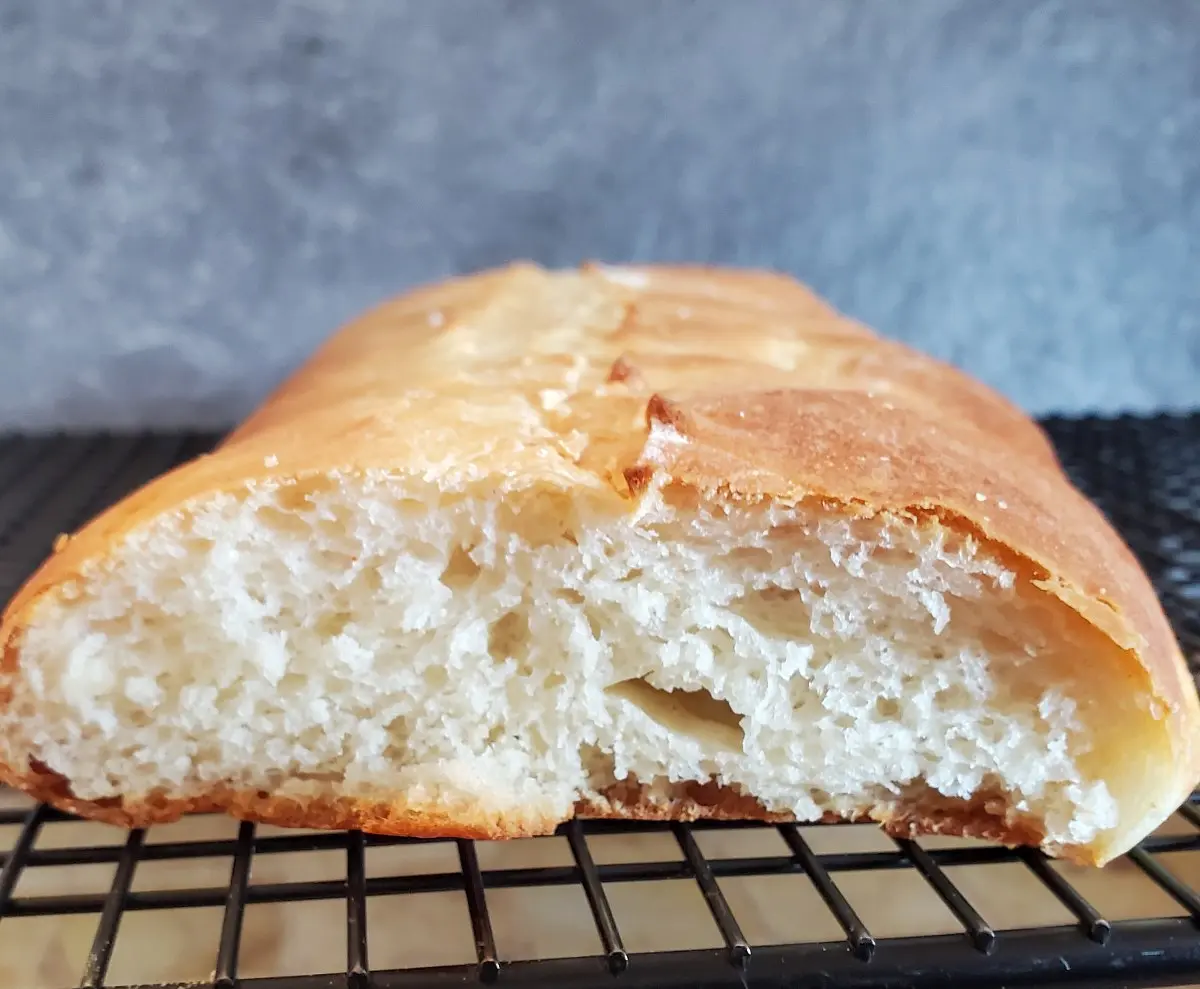
This Cuban bread recipe starts the night before and delivers two loaves of the real thing. An overnight starter builds the flavor, lard gives the crumb its signature softness, and about 12 hours of hands off rising time does most of the work for you. The result is the kind of bread that makes a Cuban sandwich worth talking about.
Jump To What You Need
Here's How to Make the Best Homemade Cuban Bread
Why You'll Love This Homemade Cuban Bread
- Budget Friendly Uses inexpensive, everyday pantry staples like flour, yeast, and sugar rather than expensive specialty ingredients.
- Authentic Flavor Lard provides the traditional, rich taste found in classic Florida bakeries.
- Saves Time Later Making two loaves at once means you have an extra bread option ready to pull from the freezer whenever you need it.
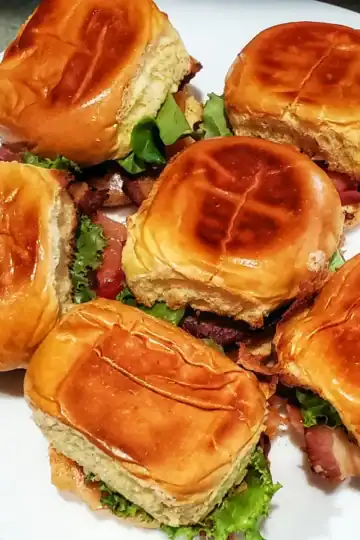
- Ideal for Sandwich Presses The unique crumb structure is specifically built to collapse beautifully inside a hot sandwich press without getting soggy.
- No Fancy Gear You can get great results using simple everyday baking sheets, a basic mixing bowl, and your own two hands.
What You Will Need
- Active Dry Yeast This gives the bread its lift, creating a light texture. We use a tiny bit in the starter and a full packet in the main dough.
- Unbleached All-Purpose Flour Provides the structure for the loaves. Unbleached flour is recommended for a better natural flavor.
- Sugar A single tablespoon feeds the yeast, helping it activate quickly while adding a subtle hint of color to the crust.
- Fine Sea Salt Crucial for tightening the gluten structure and making sure the bread does not taste bland.
- Lard or Butter Lard is the traditional choice that creates an authentic, savory flavor and a flaky crust, though unsalted butter will provide great results also.
- Cornmeal Sprinkled on the baking sheet to prevent sticking and add a nice, crunchy texture to the bottom of the bread.
How to Make Homemade Pan Cubano
- For the Starter Stir the active dry yeast, water, and unbleached all-purpose flour together in a small bowl until completely combined. Cover the bowl tightly with plastic wrap and place it in the refrigerator to rest for 8 hours or overnight. This slow rest is key for developing a great, traditional bakery flavor.
- For the Dough
- Activate the Yeast In a large mixing bowl, combine the package of active dry yeast, warm water, and sugar. Let the mixture sit undisturbed for 7 to 10 minutes to prove the yeast. You will know it is ready when it becomes highly foamy and bubbly on top.
- Mix the Ingredients Add the lard or butter, fine sea salt, and exactly one cup of the unbleached all-purpose flour to the foamy yeast mixture. Mix thoroughly until the ingredients are well incorporated and begin to form a loose, wet ball.
- Incorporate the Overnight Starter Retrieve the starter from the refrigerator. Add the chilled starter along with 1.5 cups of the remaining flour to the bowl, reserving the final half-cup of flour for the next step. Mix the ingredients together until the starter is fully integrated.
- Adjust the Dough Texture The dough will feel sticky and soft at this stage. Add the remaining half-cup of flour a little bit at a time as needed until the dough becomes smooth, pliable, and easy to handle. Shape the dough into a neat, solid ball.
- The First Rise Coat the bottom of a large clean bowl and the surface of your dough ball with a teaspoon of vegetable oil. Place the dough in the bowl, cover it with a damp kitchen towel, and let it rise in a warm spot for two hours until it has doubled in size.
- Divide the Dough Turn the risen dough out onto a lightly floured countertop or cutting board. Use a sharp knife or a bench scraper to divide the dough into two equal pieces.
- Roll and Seal the Loaves Pat each piece of dough into a rough 5 by 14 inch rectangle. Roll the dough up tightly starting from the long edge to form a 14-inch log, then firmly pinch the edges of the roll to ensure the seam is completely sealed.
- Flatten and Second Rise Sprinkle a generous tablespoon of cornmeal onto two separate parchment-lined baking sheets. Place one log on each tray, then gently press down on the tops to flatten them slightly until they are about a half-inch to three-quarters of an inch thick. Cover the trays with dry tea towels and let them rise in a warm place for another two hours.
- Score and Mist the Loaves Preheat your oven to 400 degrees F. Use a very sharp knife to cut a shallow, quarter-inch deep slice straight down the center of each risen loaf. Give each loaf a light misting of water from a spray bottle to help create a beautifully crisp crust.
- Bake to Golden Brown Bake the loaves at 400 degrees F for 10 minutes. Carefully rotate the baking sheets from top to bottom to guarantee an even color, then continue baking for an additional 10 to 15 minutes.
- Cool Before Serving Transfer the golden loaves to a wire rack. Let the bread cool completely for at least 20 minutes before slicing into it, which allows the interior crumb structure to set properly.
Tips on Proofing the Homemade Cuban Bread
Here are my two methods to create a place for proofing your bread in your home:
Method 1: The Microwave This is my usual method because it is fast and contained.
- Fill a glass measuring cup with water.
- Microwave it on high for 1 minute until it is hot.
- Push the water cup to the back corner of the microwave.
- Place your bowl of covered dough inside and close the door immediately.
- Do NOT turn the microwave on. The trapped steam and heat create a tropical environment for your yeast to wake up.
Method 2: The Oven Steam Bath If you are making a double batch or your bowl doesn't fit in the microwave, use your oven.
- Boil a pot of water on the stove.
- Place the pot of boiling water on the bottom rack of your oven.
- Place your bowl of dough on the rack above it.
- Keep the oven OFF. Close the door to trap the steam.
- Let it sit for the full rise time. The residual heat from the water keeps the air warm and moist.
Troubleshooting Your Cuban Bread
- My bread is dense and heavy This usually happens if your yeast was old or the water used to activate it was too hot. Always check the expiration date on your yeast packets and ensure the water feels like a warm bath, not a hot shower.
- My dough is too sticky to handle Dough stickiness can change based on the humidity in your house. Do not be afraid to add an extra tablespoon or two of flour during the final mixing stage until the ball pulls away from the sides of your bowl.
- The crust is soft instead of crispy Missing the water mist right before baking often causes a soft crust. Ensure you give the loaves a generous spray of water, and consider placing a shallow pan of water on the bottom rack of the oven to create extra steam.
Cuban Bread vs. French Bread
Cuban Bread
- Thin crust
- Crisp when fresh
- Easier to bite through
- A soft crumb
- Medium-sized air pockets
- A light texture
French Bread
Join My Email List!
Get no-fuss recipes and real-world kitchen skills sent straight to your inbox.
- Thicker crust
- More chew
- Crackly exterior
- Better for tearing and serving alongside meals
- A chewier crumb
- Larger irregular holes
- More structure
Like the Cuban bread recipe? Try it with my pulled pork recipe, my orange glazed ham recipe or my quick pickled red onions.
It's best to let the starter rest overnight for optimal flavor and texture, but in a pinch, a shorter rest (at least 4 hours) may work.
The starter helps improve the flavor, texture, and rise of the bread by jump-starting yeast activity.
No special equipment is needed—just basic tools like bowls, baking sheets, a sharp knife, and parchment paper.
Spraying with water helps create a crispy, golden crust on the bread.
Yes, once fully cooled, wrap the loaves well and freeze. Thaw and reheat for best results.
Cuban bread is great for toast, garlic bread, French toast, or served alongside soups and stews.
Recipe
Easy Homemade Cuban Bread (Authentic Lard or Butter Recipe)
Ingredients
- ½ teaspoon dry active yeast
- ½ cup of water
- ½ cup unbleached all-purpose flour
- 3 cups unbleached all-purpose flour divided
- ¾ cup of warm water
- 1 package of dry active yeast
- 1 tablespoon sugar
- 2 teaspoons fine sea salt
- 3 tablespoons lard (traditional) or butter
- 1 teaspoon of vegetable oil or other neutral oil
- 1 tablespoon or more of cornmeal
Method
- Mix the starter ingredients together until combined.
- Store in the fridge for 8 hours or overnight.
- Combine the packet of yeast, warm water, and sugar in a bowl and let set for 7-10 minutes to prove yeast. The yeast should get foamy and bubbly.
- Next add the butter or lard, salt, and one cup of the flour. Mix until combined. The mixture should form a ball or something resembling one.
- Add the starter and 1 ½ cups of the remaining flour. (Reserving the last ½ cup of flour) and incorporate into the mixture.
- The dough should be sticky at this point. Add the remaining ½ cup of flour as needed.
- Coat the bottom of a bowl and the ball of dough with a teaspoon of oil. Place the ball of dough in the bowl and cover with a damp towel. Let rise in a warm spot for two hours. The dough should double in size.
- After the dough has risen, turn the dough out onto a lightly floured surface and divide the dough in two.
- Form dough into roughly two 5 x 14 inch rectangles. Roll the two rectangles into roughly two 14 inch logs and pinch the edge of the roll to seal the dough.
- Sprinkle the cornflour onto two parchment covered baking trays.
- Gently press the logs down slightly to flatten the tops (do not flatten completely).
- Cover the baking trays with clean tea towels and let rise for two hours.
- With a sharp knife, slice the top of the risen dough ¼ inch deep down the center of the loaf. Spray each loaf with a bit of water.
- Bake at 400 degrees F for 10 minutes. Rotate baking trays top to bottom and bake for 10-15 minutes more.
- Let the dough cool for at least 20 minutes before cutting into them.


Leave a Reply
You must be logged in to post a comment.