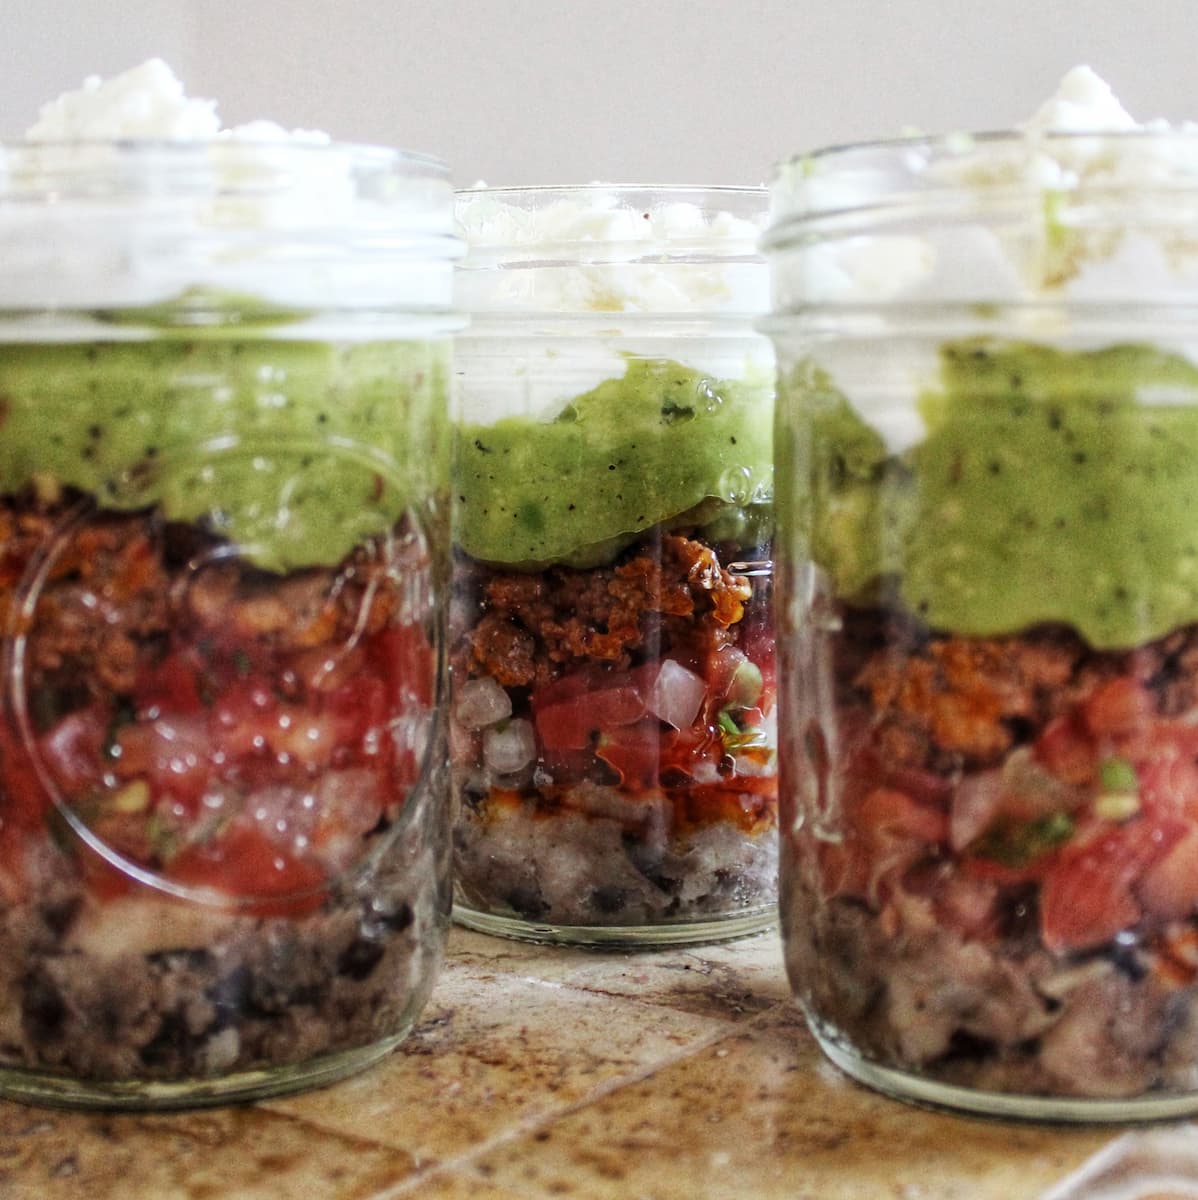
Skipping the drive-thru is much easier when you have a delicious meal waiting for you in the fridge. This meal prep layered taco salad combines savory chorizo, creamy guacamole, and fresh veggies into a convenient jar. It is a family-friendly way to enjoy real food without the daily cooking stress.
Why You Will Love the Meal Prep Layered Taco Salad
- It is budget-friendly Buying lunch out every day adds up very quickly. These jars cost a fraction of what you would pay for a similar salad at a fast-casual restaurant, helping you save money without feeling like you are cutting corners.
- It helps reduce food waste This method is an excellent way to use up those small amounts of ingredients that often get lost in the fridge. You can easily use up the last bit of a block of cheese, half an onion, or a small portion of leftover protein so nothing goes to waste.
- It creates stress-free mornings Knowing that a healthy, substantial lunch is already packed and waiting for you removes one big decision from your morning routine. You just grab the jar and go.
- It keeps the crunch Soggy salads are the enemy of meal prep. By layering the wet ingredients at the bottom and the delicate greens at the top, everything stays crisp and fresh until you are ready to eat.
Ingredients for the Portable Taco Salad
- Refried Beans This acts as the sturdy foundation of your jar. The dense texture holds up well at the bottom and doesn't get soggy easily. You can use traditional pinto bean style or black bean refried beans.
- Pico de Gallo This adds a necessary bright, acidic kick to cut through the richer ingredients. Using a fresh pico (tomatoes, onions, cilantro, lime) is often better than a jarred salsa, which can be too watery for this layered application.
- Cooked Chorizo Sausage Chorizo provides a deep, smoky flavor and a bit of heat. Since it is heavily spiced, you don't need to add much extra seasoning to the jar. Make sure it is fully cooked and drained of excess grease before layering.
- Guacamole This adds that essential creamy, cooling element. It pairs beautifully with the spicy chorizo.
- Sour Cream A classic taco topping that adds tanginess. You can use full-fat for richness or a lighter version if you prefer.
- Queso Fresco This crumbly, mild Mexican cheese finishes the jar with a nice salty bite and a contrasting texture. If you cannot find queso fresco, a mild feta or shredded Monterey Jack works well too.
Recommended Equipment: Why Wide-Mouth Matters
Wide-Mouth 8oz (Half-Pint) Mason Jars While you can use any jar, wide-mouth jars are the best choice for this recipe. Standard mason jars have a curved "shoulder" at the top that can trap ingredients and make it frustrating to eat with a fork. A wide-mouth jar has straight sides, making it easy to fill, easy to eat from, and easy to clean.
Directions for the Mason Jar Taco Salad
- Prepare the Ingredients Cook your chorizo in a skillet until it is browned and cooked through. Drain any excess fat and let it cool slightly. If you are making homemade pico de gallo or guacamole, prepare those now.
- Begin Layering Set out your three 8-ounce mason jars. Using a spoon, place about 3 tablespoons of refried beans into the bottom of each jar. Use the back of the spoon to smooth it into an even layer.
- Add Freshness and Protein Next, spoon 3 tablespoons of pico de gallo over the beans. Follow this with 3 tablespoons of the cooked, cooled chorizo.
- Add the Creamy Layers Add 3 tablespoons of guacamole on top of the chorizo, followed by 3 tablespoons of sour cream.
- Top and Seal Finish each jar with 3 tablespoons of crumbled queso fresco. Wipe the rims of the jars if there are any spills, place the lids on tight, and refrigerate until you are ready to serve.
Try my roasted poblano chicken enchiladas!
FAQ's:
I usually make them the night before serving. While they are durable, I prefer not to go longer than 24 hours because the guacamole can lose its vibrant green color and the pico de gallo might release too much liquid.
If you find chorizo too spicy, plain ground pork sausage is a great substitute. You could also use seasoned ground beef, shredded chicken, or even leftover taco meat from a previous dinner.
Yes, this is very easy to adapt. To make it vegetarian, simply omit the chorizo or swap it for seasoned black beans or a plant-based crumble. For a vegan version, use vegan cheese and sour cream alternatives alongside the plant-based protein.
Join My Email List!
Get no-fuss recipes and real-world kitchen skills sent straight to your inbox.
You have two options. You can shake the jar vigorously to mix the ingredients before eating it with a long fork. Alternatively, dump the contents into a bowl and mix them up there. It works great as a dip with tortilla chips too.
The order helps keep everything fresh. Placing the denser ingredients like refried beans at the bottom creates a sturdy base. You want to keep wetter ingredients away from any potential crunchy toppings (like tortilla strips if you add them) until you are ready to eat.
Cooking with AI? Click the button below to send this exact recipe to ChatGPT so it doesn't miss any ingredients.
Recipe
Meal Prep Layered Taco Salad
Ingredients
- 9 tablespoons of refried beans
- 9 tablespoons of pico de gallo
- 9 tablespoons of cooked chorizo sausage
- 9 tablespoons of guacamole
- 9 tablespoons of sour cream
- 9 tablespoons of queso fresco or a cheese of your choice
Method
- This recipe is for 3 jars of layered taco salad
- Use a spoon to add 3 tablespoons and layer each ingredient, refried beans through queso fresco into the 8 ounce mason jar.
- Place cover on top and refrigerate until serving.
Nutrition
Notes
- Serving Size This recipe makes enough for three 8-ounce jars. If you want a larger main meal, you can double the quantities and use pint-sized (16oz) jars, perhaps adding a layer of shredded lettuce or rice.
- Temperature While these are kept in the fridge, letting the jar sit at room temperature for about 10 to 15 minutes before eating can help the flavors shine and soften the bean layer slightly.
- Chips Do not put tortilla chips inside the jar as they will get soft. Pack them in a separate baggie if you want crunch.
Leave a Reply
You must be logged in to post a comment.